Between the mid-Eighties and around 1991, our home computer was an Apple IIe. This was a pretty much uncommon machine in Greece, and we had a hard time finding software and hardware for it. Thankfully, the Apple was a hardware hacker machine, and came will full documentation as standard. Full, in those days, included a description of the hardware that was detailed enough for you to build a replica of the computer.
So the Apple was modified in a number of occasions. Many of the games we managed to find needed a joystick to work ― very frustrating because original Apple joysticks cost far too much, and third party joysticks were either digital Atari-type jobs or analogue joysticks for the PC.
So I built a few different joysticks, tailored to playing specific games. most of which were ‘no parts’ devices from whatever I had lying about, including audio cassette cases to house the things (which obviously broke often). This practice culminated in my buying a cheap PC joystick which I ‘ported’ to the Apple (chop off 15-pin plug, identify cables, solder new plug).
Right before that happened, however, I designed and built this rather unusual joystick. It's built around a real F4 fighter plane stick. I'm not being figurative here, this part was stripped from an actual fighter. My father had been using it as a fancy gear stick knob for several years. My brother's godfather even had his (there were two!) wired to the lights, horn et cetera on his VW Beetle. When my father's car's interior got redone, the stick was removed and lived in a closet for years.

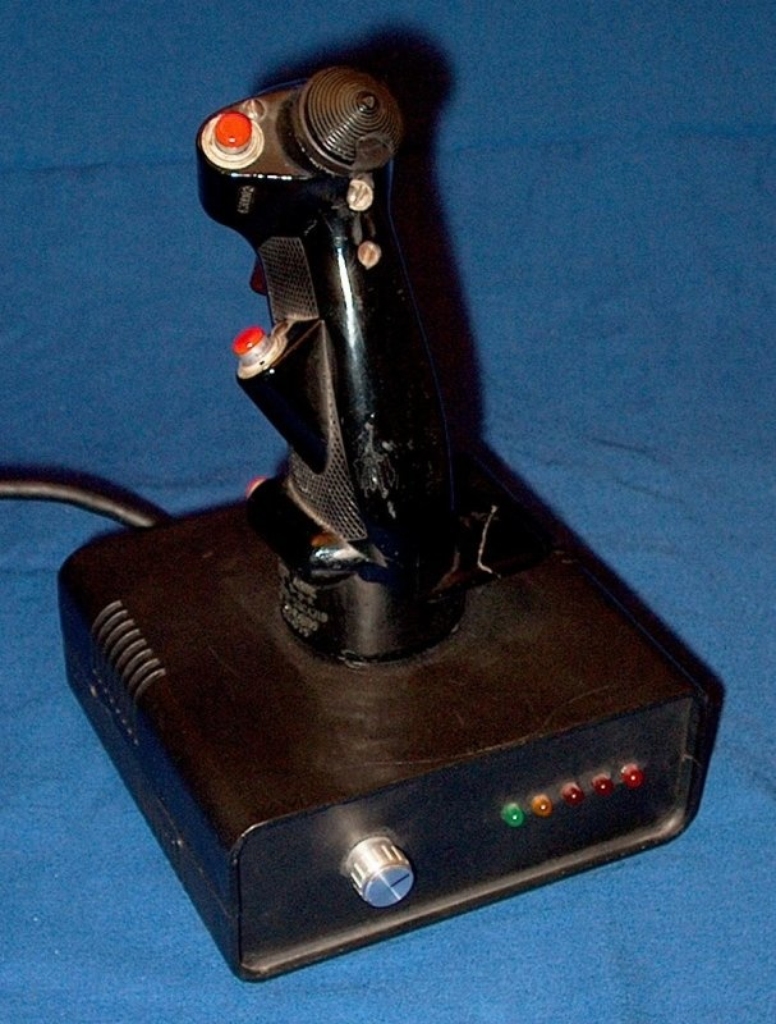
An Apple II Joystick built around a real control stick.
The Stick
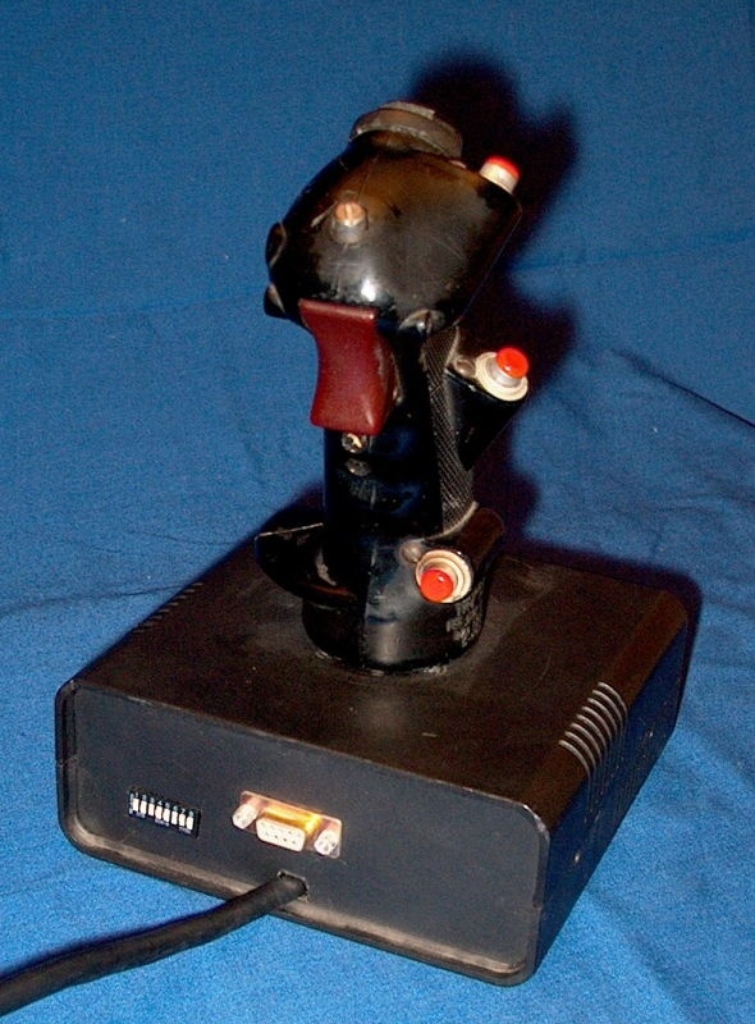
The stick is made of black Bakelite, or some other nasty but rugged plastic. It's shaped around a length of steel pipe that runs down the device carrying cables. This being actual military hardware, it's very ergonomic. There's a two-level trigger (with a tension trimming screw), a hat to control the plane's trim, and three very loud switches. The feel of the switches was excellent, although the third one (positioned just beyond the pinky) was far too hard to use. I suspect that particular switch would have been replaced by a better, longer pinky switch in later models.
The stick was a bit weathered: the edge of the trim hat had broken off years before, and so had the palm-rest ― they were glued together, and all the switches were removed from the shaft so I could fit modern cables. This was harder than it looks! There were screws under resin-filled holes. This resin was unbelievably hard to scrape off, and I distinctly remember it took ages.

Rear side of the joystick, showing the trigger, dip switch bank and slave joystick connector.
Tilt Switches
Unfortunately, I had no way of building the analogue joystick mechanics (the Apple had analogue joysticks, just like the later IBM PC). So I experimented with something that had been in my mind for weeks at the time: tilt switches. These things are not solid state, and not built inside IC packages. They're little glass bulbs with a drop of mercury and two electrodes. The mercury moves freely inside. Give the bulb enough tilt, and the mercury moves to make or break contact. These were used in pinballs to detect tampering (hence the name).
The idea was to forgo analogue motion, but to allow the entire joystick housing to move freely, transmitting the motion to the Apple. This proved to be quite feasible given my very limited empirical electronics knowledge at the time (it's not much better now, mind you). So off I went to build what must have been the most configurable hacker-friendly joystick this side of the Nineties. And possibly the heaviest, strangest one too.
Construction
As soon as the stick was looking slightly better, I covered the evil screw holes with the type of modeling clay that hardens quickly. It was still softer than the resin, and generally a bad choice of material, but you use what you have (read: I was clueless). I mounted the stick on the top of a black plastic project box, with a large hole at the centre of the top cover for the cables to pass through. A lot of functionality was built into that joystick because I was going for a generic, customisable thing I could use to play any game I came across.
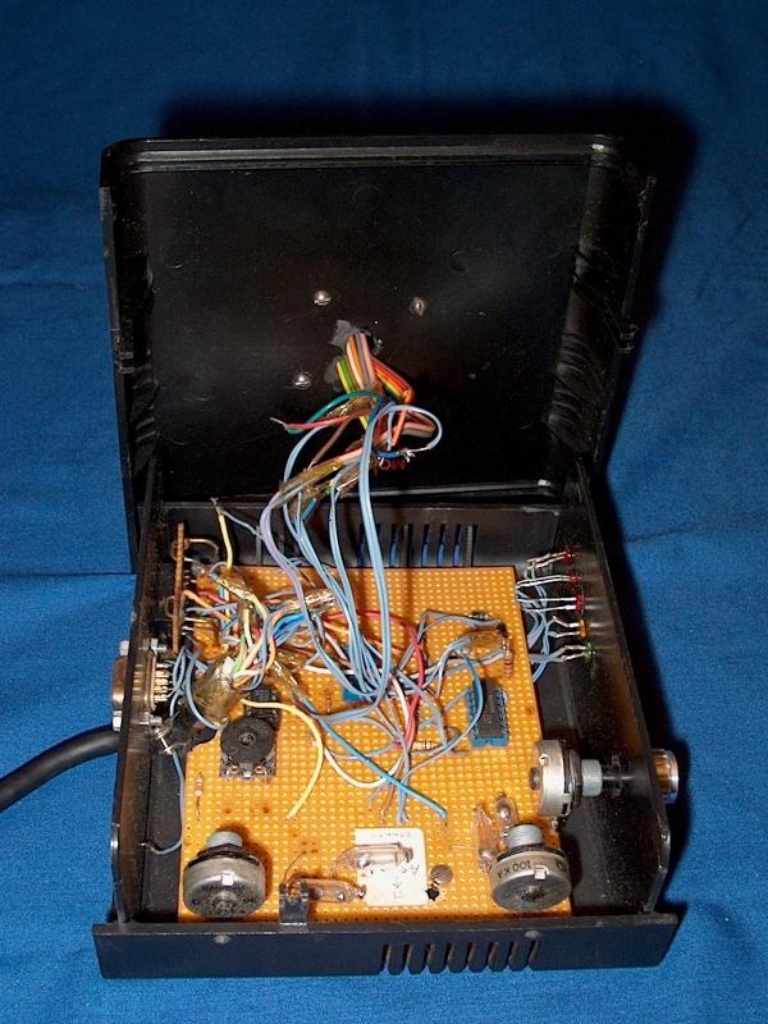
There were trimmer pots to calibrate the centre position of the joystick. These were mounted near the side of the case, with small holes to access their slotted rears with a screwdriver. There was an auto-fire circuit built around the 555 timer, and a tiny bit of 74xx logic for the fire buttons and dip switches. Dip switches? Yes, I was sick. You could customise that thing using a bank of eight switches. A 9-pin Apple-compatible joystick socket in the front (back from the player's point of view) of the case connected to a slave joystick. This allowed two joysticks to be used simultaneously without buying an Apple Y-splitter cable. Overall, there were four axes, but only three buttons. The dip switches, among other things, allocated buttons to either joystick and set up various little features like the (partial) mapping of the buttons to the stick's controls.
Because no hackish device is complete without blinkenlights, this thing had five LEDs. A green one indicated power; the yellow one showed the autofire rate, which could be controlled using a front-mounted pot with a cheapo aluminium knob; and three red ones indicates fire button status.

Inside the joystick. Tilt switches and trims in the foreground; slave socket and dip switches in the left background; LEDs in the right background; and the autofire circuitry dead centre.
Using the Thing
This was both a joy and a bit of a pain. The stick was remarkably useful and usable, and the buttons were fantastic. The motion detection left something to be desired.
Better motion detection, for one.
It was okay, I suppose, unless you tilted it too fast. Then the mercury droplets splashed around in their glass bulbs, and the signal bounced with them. It took remarkably little effort to get used to that, though.
The big problem was the weight. A type of gorilla arm effect whereby your arm would get very tired very fast, tilting a joystick in mid-air. Eventually I solved it by resting the case on my knee, and tilting it there.
At a Glance
So, what could it do? Here's some marketing blurb for you!
Fantastic ergonomy!
Tilt switch design. No moving parts!
In stylish black and red. Looks right at home next to your Oric Atmos!
Realistic fighter plane stick (hell, it is real).
Two-level trigger. Squeeze it half-way for single-shot mode. Squeeze it more for autofire.
Trigger tension trim. Lets you calibrate the trigger for your index finger.
Trim hat with user-defined functionality (doubles as fire button).
Three military grade red fire buttons in addition to the trigger.
Autofire with fully controllable rate, so you don't miss a shot!
Rugged black cable ensures long life (it's lasted twelve years so far).
Slave joystick socket allows you to connect a second Apple II joystick without an Apple Y-splitter (second joystick not included).
Five LEDs indicate power, autofire rate, and fire button status.
Eight DIP switches customise the joystick's behaviour making it suitable for any Apple II game in existence.
